Tuesday, August 21, 2012

Iced Coffee!

I am an iced coffee addict.

Eight or so years ago I was working full time as a nurse at the University of Washington Medical Center while my hubby attended Dental school.  Those early mornings for the day shift were never easy for me. I'm what you call a NIGHT PERSON. Through and through.  Doesn't matter if I wake up at 5:15 AM for four years straight (which I did)....I am still groggy, quiet and subdued until 9 AM.  It just IS what is IS.

So, coffee was extremely helpful for those early mornings. During the random hot (for Washington, that is) summer days we roasted in our third story air conditionless apartment...and dreaded opening windows as they would let in not just cooler air but a plume of smoke from the oh so pleasant chain smoking fellow who lived directly under our apartment.

So, hot coffee? Yeah no. I decided to try iced coffee. Problem was, pouring hot brewed coffee over ice is NOT yummy. At all. Add in your necessary creamer and you get something diluted and metallic. No, thank you.

Thanks to the wealth of information on the good ole internet I researched the best way to make iced coffee. I landed on a random professional coffee roasters site that explained the cold brewing process. Um, what? Cold brew?

COLD brewing coffee leaves you with a nice smooth, rice concentrated coffee base that is NOT METALLIC.  It is sweeter and not acidic and tastes the best with some sort of creamerization. Yes, I made that word up.  Also? It's easy peasy!

Apparently there is also now an ice brew coffee method that is growing in popularity where you fill your coffeemaker carafe with ice cubes to let the just brewed hot coffee instantly cool in the carafe as it drips down. However, it is meant to be drunk WITHOUT CREAMER...and that is just a NO GO in my coffee land.  So no ice brewing here!

I have been drinking cold brewed coffee ever since first trying it out 8 years ago.  I usually start cold brewing in the late spring through the fall months as in the winter I need a good morning hot coffee.

Convinced you yet? Let's make some cold brew iced coffee!
Supplies:
  •  A pound or so of dark roast coffee - preferably one with sweet tones, NOT acidic or "earthy" tasting. I love Ethiopian Sidamo.
  • A large container for soaking, 1.5 - 2 gallon size.  I use dutch tupperware: A leftover 1.5 gallon ice cream container, courtesy of Edaleen dairy works great!  I also use my 2 gallon stock pot - but note: do not use an uncoated metal- it reacts with the coffee and will give it more of an acidic, metallic taste.
  • Large Spoon - you know. To stir. I really didn't have to write that I just needed something here to italicize.
  • Coffee pot with metal mesh strainer. A paper cone filter will work it just takes forevah and a day to strain the coffee.
  • 24 hours. Yep, TIME is on your side my friend.
Determine your coffee to water ratio:

  • 1 lb coffee to 2 gallons (8 quarts) water
  • 1/2 lb coffee to 1 gallon (4 qts) water
  • 11-12 oz coffee (common bagged amount) to 1.5 gallons (6 qts) water

 Dump your coffee into your container and fill it with water according to your ratio.


Yep, make sure all the coffee ground get wet.


Cover it and yes, wait for 24 hours!  Stir it every few hours as able but for the most part just leave it be.

Next up, the magic:


After 24 hours are up, I move my container next to my coffee pot and start carefully (um, yeah, not really) ladling the liquid directly into my coffee filter. It pours through pretty quickly.  When the filter starts looking like the above right pic you need to rinse it out a bit.  I rinse it out about 4 - 5 times during a 1.5 gallon filtering session.

These are the grody leftovers. But don't throw em away! Go put them in your garden...your plants will love you for it! And bonus, your garden smells like a fresh pot of coffee :)

Pour your gold, er, I mean coffee concentrate (which I've also nicknamed "Coffee Sludge") into containers for storage.  I use a drink dispenser to keep it cool in my fridge. Most of my close friends know that lime green topped dispenser very well!

For traveling and gifting, I reuse those ginormous Coffee-mate creamer containers. They work great!


Directions: Fill sad, empty large mouth ball canning jar with ice, cover with coffee sludge and then....creamerize!  It's a beautiful thing really.


Enjoy your home cold brewed iced coffee!!!

Amanda - Vintage Dutch Girl

Wednesday, August 8, 2012

Aqua, Red and Yellow Dining Room...

Per the usual, I am woefully behind on blogging.

Shocking!

What can I say, we've been busy actually USING our sassy newly redecorated travel trailer, Lumi. And having a Mah-velous time! (Quick, name that movie quote!).

However, I did run across some photos I forgot to show all three of you, so hold on to your socks!

I finally got my act together oh four to six months ago and put my dining room together a bit more.

After a four year wait we were able to rid our home of the ugly baby poo dark gold on all of our walls and all of our CEILINGS. Yep, ceilings. Because some interior designer out there decided that yes, let's paint the ceilings a nice dark cave color. In a house in the Pacific NORTHWEST. Oy.

Now we have a normal nice bright white ceiling and the color match equivalent of Restoration Hardware's Silver Sage (which actually looks like a pale aqua blue). I was ITCHING for some yellow chevron curtains and after trolling my fave fabric site (fabric.com) for-evah waiting for it to be back in stock I finally got my hands on it. LOVE the pop of sunshine it brings to my oft dark and dim dining room:


I looked at the mish-mash of wall decor I had on hand and thought "hey, why not?" and closed my eyes and nailed stuff to the wall. I'm pretty thrilled with how it turned out. Eclectic? Maybe :) But it makes sense to me.


Eat Drink & Be Merry, Tomorrow we shall Diet:

Which really is there to remind me how to set a table. Because yes, I am in my third decade of life and can not for the life of me remember how to set a table.

And there's this lovely new to me black planked counter height table my gal pal Trac let me buy from her. LOVE it. It it well loved which suits my hard-on-furniture family.  Add four cherry red pleather chairs (Because I'm not stupid. REAL leather chairs for my preschoolers to destroy? No thank you.) to add some more pop of color and you have yourself a fun dining room.


Sources:


But act fast, as of my last check they only have 3030 yards left!

Wall color: RH Silver Sage. Or color match it like I did :)
Ceilings: BM White Dove
Blueberries sign above slider door? OOAK Ruffles & Rust Show find.
Mish-mash of wall decor: Mostly TjMaxx. Because I AM a Maxxinista.
Red Pleather Dining Chairs: Overstock.com


Cutie toddler eating her lunch? Sorry, not for sale :)

Off to eat my lunch while my kiddos are hopefully non destructive in their rooms during "quiet" time. Yep. That's in quotation marks.

Amanda - Vintage Dutch Girl

Monday, June 25, 2012

Travel Trailer Makeover, Part 6: New Dinette! Recover those cushions!

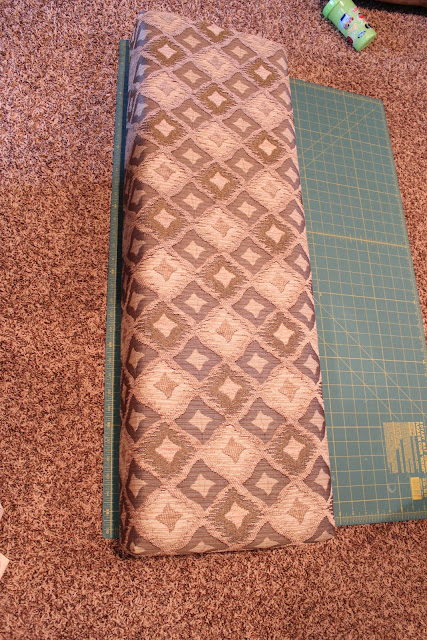
OK yes, this travel trailer factory direct diamond pattern fabric has GOT to go. I decided to attack the entire dinette cushion recovering in one day. Because that's how I do things. Nothing for a loooooong time then a huge flurry of activity. Remind you of my blogging schedule!? :)

So yes, these cushions:


 From this dinette:


Five cushions to recover, including two rather oddly shaped triangular corner cushions. Hoo boy. This is gonna be a big job.

First off I took off the old covers and measured every single bit of them to draw up my cushion patterns. Then I cut out the flat panel patterns from the chevron fabric.....taking pains to make sure the colors and zig-zags lined up appropriately with the other cushions. And making sure the fabric wasn't upside down.

Because if it IS upside down you may waste a good yard or so of fabric. {Ahem}

I had to seriously muscle the foam into some of these covers but wanted to make sure they were a snug fit.  I bought a cover button pack and covered them in parts of the chevron fabric. I used a long, upholstery size needle (see pic) to thread the button strings through the thick foam. Once again, lots of muscle used! My forearms were super sore the next day!


And now, confession time: I did NOT want to struggle with putting fancy, neat zippers on these five cushions so instead I closed up the openings with safety pins :)  Once again, saved a ton of time, and they are all hidden inside the dinette frame anyways!

All in all I was very pleased with how these came out. MUCH more fresh and fun. Here you go, the finished dinette makeover:
 And the before/after side by side shot:


Quite a difference, right!?

Next up: the dreaded COUCH project. OY.

Amanda - Vintage Dutch Girl
Check out all the posts from this Travel Trailer Makeover Series!
Related Posts Plugin for WordPress, Blogger...